How to Use a Cut List Optimizer App on iPhone or iPad

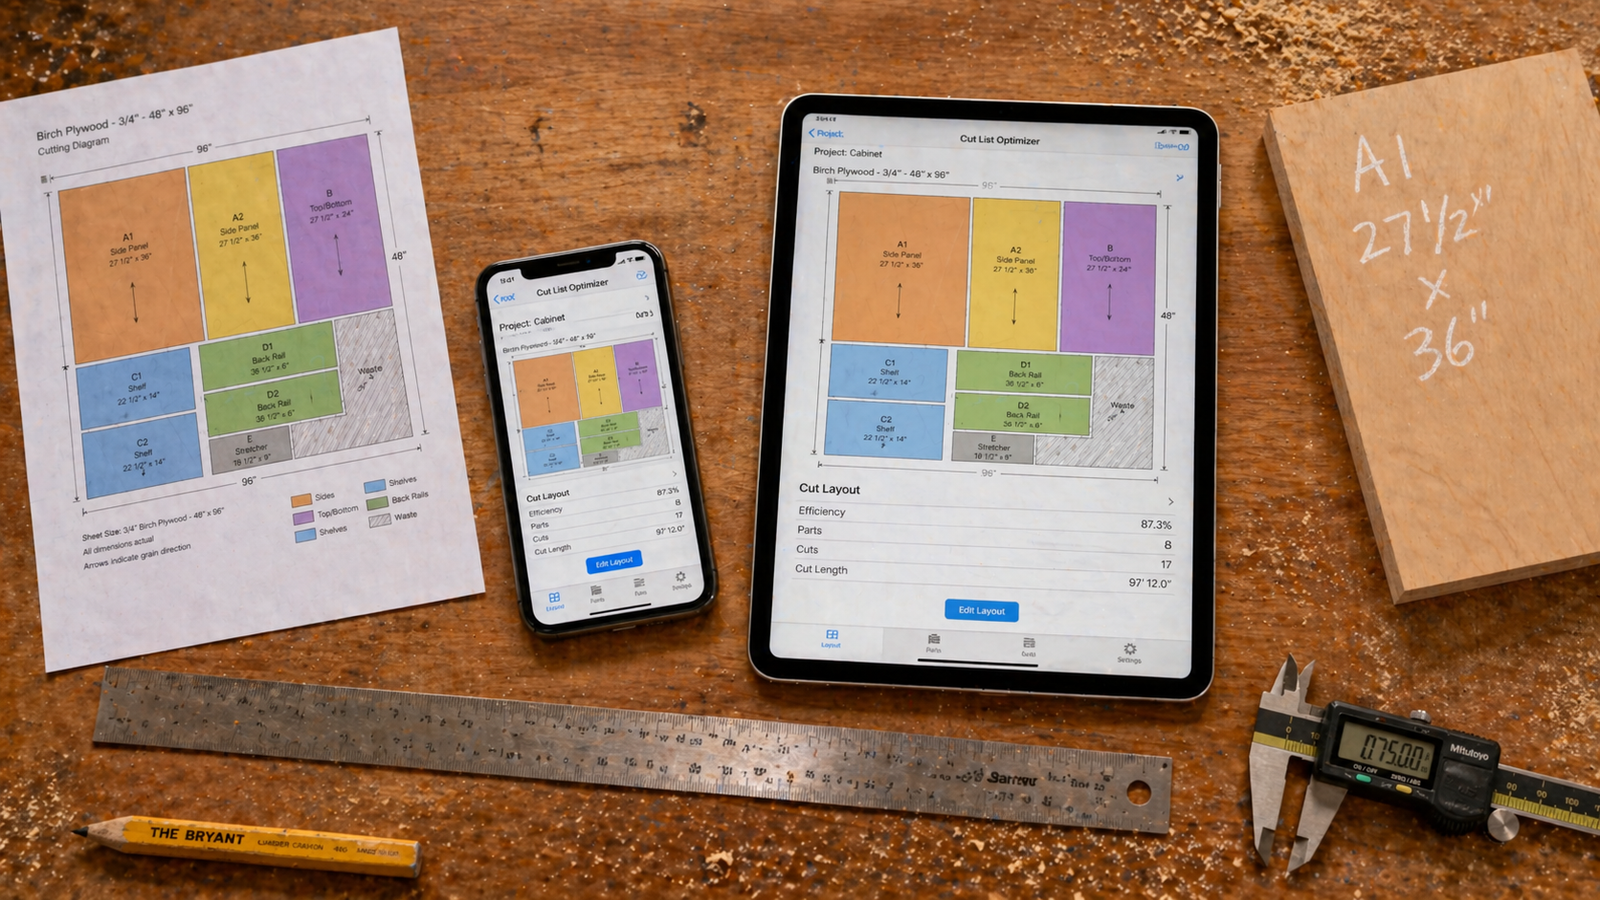
How to Use a Cut List Optimizer App on iPhone or iPad
If you've been planning plywood cuts on graph paper, in a spreadsheet, or just eyeballing it at the saw, switching to a cut list optimizer app is one of the most immediately impactful upgrades you can make to your woodworking workflow. In the time it takes to sketch a rough layout by hand, a dedicated app can evaluate thousands of part arrangements, account for saw kerf, respect grain direction constraints, and produce an optimized cutting diagram with a step-by-step guide — on the iPhone or iPad that's already in your pocket. This guide walks you through exactly how to use a cut list optimizer app from start to finish: setting up your first project, entering your parts, configuring your stock and settings, running the optimization, reading the results, and getting the cutting plan from your screen to your saw. All examples use Cut Optimizer — a purpose-built cut list optimizer for iPhone and iPad by Asaru Labs.
📱 Cut Optimizer — Built for iPhone and iPad
Available free on the App Store. Supports metric and imperial, saw kerf, grain direction, edge banding, offcut stock, PDF and SVG export, and iCloud sync across all your Apple devices.
What Does a Cut List Optimizer App Actually Do?
Before diving into the how-to, it helps to understand what the app is solving. At its core, a cut list optimizer takes two inputs:
- Your parts list — every piece you need to cut, with dimensions, quantity, material, grain direction, and edge banding requirements
- Your stock panels — the sheets of plywood, MDF, or melamine you have available, with their dimensions and how many of each
It then uses a 2D bin-packing algorithm to arrange all your parts on the minimum number of stock sheets, respecting kerf gaps between every part, honouring grain direction locks, and generating the arrangement with the lowest possible waste. The output is a colour-coded cutting diagram per sheet, a waste percentage, and a step-by-step cutting guide sequenced for safe execution on a table saw or track saw.
What makes this genuinely valuable — rather than just a digital version of graph paper — is the computational scale. A human planner evaluating three or four layout arrangements by hand might find a solution with 18% waste. The Cut Optimizer app evaluates thousands of arrangements in seconds and routinely achieves 5–10% waste on the same parts list. On a five-sheet project, the difference can be an entire saved sheet of material.
Step 1 — Download and Set Up the App
Download Cut Optimizer from the App Store on your iPhone or iPad. The app is free to download with a premium upgrade available for advanced features. It requires iOS 17.6 or later on iPhone and iPadOS 17.6 or later on iPad, or macOS 14.6 or later if you're running it natively on an Apple Silicon Mac.
On first launch, you'll be prompted to choose your preferred unit system — metric (millimetres) or imperial (inches, including fractional input like ¼", ⅛", and 1/16"). You can change this at any time in Settings. Choose the system you work in natively; there's no conversion required on your end.
💡 Tip: If you work with both metric and imperial materials — for example, metric sheet goods but imperial hardware — set the app to whichever unit system your sheet dimensions use. The optimizer handles all internal calculations in your chosen unit, so consistency in stock panel dimensions is the priority.
Step 2 — Create a New Project
Tap the + button on the Projects screen to create a new project. Give it a descriptive name — "Kitchen Base Cabinets," "Workshop Shelving Unit," "Bedroom Wardrobe" — something that identifies it clearly when you return to it later. Projects are saved locally and sync via iCloud to all your Apple devices signed into the same account, so a project started on your iPhone at the lumber yard continues seamlessly on your iPad in the workshop.
Each project in the Cut Optimizer app is self-contained: it holds your parts list, your stock panels, your settings (kerf, trim allowance, units), and the generated cutting diagrams. You can have multiple projects open simultaneously and return to any of them at any time.
Step 3 — Enter Your Parts
This is the most time-investment step — and the one that determines the accuracy of everything the optimizer produces. Navigate to the Parts section of your project and add each piece you need to cut. For every part, you'll enter:
- Part name — use a clear, descriptive label ("Left Side Panel," "Top Shelf," "Drawer Bottom Front") rather than generic labels like "Part 1"
- Width — the shorter face dimension of the finished part
- Length — the longer face dimension of the finished part
- Quantity — how many identical pieces you need
- Material — select or create the material type (links to your stock panels)
- Grain direction — Along Length, Along Width, or Free (see the section below on grain settings)
- Edge banding — select which edges require banding: Left, Right, Top, Bottom, or any combination
Enter finished dimensions — the exact size each piece needs to be after cutting, not a rough size. Kerf compensation is handled by the optimizer separately; do not subtract kerf from your part dimensions.
⚠️ Common Mistake: Entering nominal plywood thickness instead of actual thickness is one of the most frequent data entry errors. A sheet sold as ¾" or 18 mm birch plywood typically measures closer to 17.8–18.0 mm actual. For parts whose width or length is determined by the actual thickness of an adjacent panel — such as a shelf spanning between two side panels — always verify actual thickness with a caliper and use that measured value in your cut list.
Step 4 — Set Up Your Stock Panels
Navigate to the Stock Panels section and add the sheets of material you're working with. For each stock panel, enter:
- Width and Length — the full nominal dimensions of the sheet (e.g. 1220 × 2440 mm for a standard 4×8 panel)
- Material — must match the material assigned to your parts so the optimizer links them correctly
- Quantity — how many sheets of this type you have available. If you're still at the purchasing stage, enter a high number (e.g. 99) and the optimizer will tell you how many it actually uses
- Priority — if you have offcuts from previous projects, add them as separate stock panels and set them to higher priority than full sheets. The optimizer will use offcuts first, reducing material cost
Adding real offcuts from your workshop as stock panels is one of the highest-value features of the Cut Optimizer app. Measure each usable offcut, add it as a stock panel with a quantity of one, and set it to priority stock. The optimizer will fit as many parts as possible onto existing offcuts before opening a full new sheet — often saving one or more full sheets on medium-sized projects.
Step 5 — Configure the Optimizer Settings
Before running the optimization, review the project settings. These are the parameters that have the biggest impact on layout accuracy and real-world usability:
Saw Kerf
Enter the width of material your blade removes per cut. For a standard 10" table saw blade, this is typically 3.0–3.2 mm (⅛"). For a thin-kerf blade, use 2.4–2.6 mm. For a CNC router with a ¼" bit, use 6.35 mm. Measure your actual blade kerf on a scrap piece with a caliper for the most accurate value. This single setting affects every gap between every pair of adjacent parts across every sheet in the project.
Trim Allowance
Set the amount the optimizer should reserve along the reference edges of each stock panel for factory edge trimming. A value of 5–10 mm per edge is standard practice — it ensures the optimizer doesn't try to place parts flush against the raw factory edge, which is rarely perfectly straight or square. This appears as a margin on the cutting diagram indicating where your first trim cut goes.
Part Spacing
Some optimizers offer an additional spacing value separate from kerf — useful if you want extra clearance between parts for safety margin or to accommodate a scoring blade on a panel saw. If your kerf value is accurate, additional spacing is usually unnecessary for table saw work.
| Setting | Recommended Value | Effect on Layout |
|---|---|---|
| Saw kerf | 3 mm / ⅛" (table saw) | Gap reserved between every adjacent part pair |
| Trim allowance | 8–10 mm per edge | Margin reserved at sheet reference edges |
| Units | Match your working system | All dimensions in diagram and guide use this unit |
| Grain direction (per part) | Lock visible, free hidden | Controls rotation eligibility for each part |
| Stock priority | Offcuts higher than full sheets | Order in which stock panels are filled |
Step 6 — Set Grain Direction Per Part
Before running the optimizer, review the grain direction setting for each part. This is a critical step that affects both the visual quality of your finished project and the efficiency of the layout — and it's one of the settings most commonly left at its default by new users, at a significant cost to material yield.
In the Cut Optimizer app, each part has three grain options:
- Along Length — the face veneer grain runs parallel to the part's longest dimension. Use for cabinet sides, door fronts, and furniture tops
- Along Width — grain runs parallel to the shorter dimension. Less common; use only when explicitly required
- Free — the optimizer can rotate this part to any orientation. Use for hidden structural parts: cabinet backs, drawer boxes, internal fixed shelves, subfloor decks
Parts marked Free act as gap fillers in the layout — the algorithm slots them into spaces left by the grain-locked visible parts, reducing waste significantly compared to an all-locked arrangement. On a 30-part cabinet project, correctly classifying hidden parts as Free typically saves one full sheet of plywood compared to locking everything.
Step 7 — Run the Optimization
With parts entered, stock panels defined, and settings configured, tap Calculate (or the equivalent optimize button in the app interface). The optimizer runs its bin-packing algorithm across all parts and sheets simultaneously. On an iPhone or iPad, this typically completes in under five seconds for projects with up to 50 parts — visibly faster than it takes to read this sentence.
What happens during the calculation:
- Parts are sorted by area — larger parts are placed first, as they are the most constrained
- Grain-locked parts are tested in their fixed orientations; grain-free parts are tested in both 0° and 90° orientations
- Kerf gaps are inserted between all adjacent parts in both directions
- Trim allowances are reserved at the reference edges of each stock panel
- Stock panels are filled in priority order — high-priority offcuts first, then full sheets
- The algorithm iterates through arrangement variants and selects the solution with the lowest total waste percentage
If the optimizer cannot fit all parts onto the available stock (for example, if you entered insufficient stock quantity), it will flag this clearly — showing which parts are unplaced — so you can add more stock and re-run.
Step 8 — Review the Cutting Diagrams
After optimization, you'll see a screen showing one cutting diagram per stock panel used. This is the most important output of the entire process — the visual map you'll take to the saw. Take time to review it carefully before printing or cutting:
- Check part colours and labels — tap any part rectangle to see its name, dimensions, grain direction, and edge banding requirements. Confirm that the parts you expected to see are present and correctly labelled
- Verify grain direction arrows — check the direction arrow on every appearance-critical part. An arrow pointing along the part's length means grain runs lengthwise; across the width means cross-grain. Any locked part showing the wrong orientation should prompt a recheck of the grain setting in your parts list
- Check the waste percentage — each sheet shows its individual waste percentage and the project-level total. A good optimization result for a typical cabinet project is 5–12% total waste
- Review edge banding indicators — banded edges are typically shown with a coloured highlight or border on the relevant edge of each part rectangle
- Zoom into tight arrangements — pinch to zoom on any area of the cutting diagram to inspect closely placed parts. Verify there is a visible kerf gap between every adjacent pair
If the results look wrong — parts placed incorrectly, waste higher than expected, stock not fully utilised — revisit your settings, recheck grain direction classifications, and re-run the optimizer. The Cut Optimizer app recalculates instantly, so it costs nothing to iterate.
💡 Tip: If your waste percentage looks unusually high after optimization, the most common causes are: too many grain-locked parts that could be freed, stock panels that are significantly larger than the parts being cut from them, or a trim allowance that's wider than necessary. Try freeing grain on hidden parts and reducing the trim allowance to 5 mm, then re-run and compare.
Step 9 — Use the Step-by-Step Cutting Guide
The cutting diagram shows you where parts sit on each sheet. The step-by-step cutting guide tells you in what order to make the cuts. These two outputs work together — and the cutting guide is what makes the Cut Optimizer app genuinely useful at the saw rather than just at the planning table.
The guide sequences cuts following the guillotine principle — every cut runs fully from one edge of the remaining panel to the other, the way a table saw or panel saw actually operates. The sequence is always:
- Trim reference edges (factory edge cleanup cuts)
- Primary rip cuts — dividing the full sheet into strips
- Crosscuts on each strip — dividing strips into individual parts
- Any secondary rip cuts on remaining sections
As you work through the guide in the workshop, the active cut is highlighted on the layout viewer simultaneously, so you always know exactly where on the sheet you are. Tap each step to mark it complete and advance to the next — a simple progress-tracking feature that's especially useful in multi-sheet projects where losing your place can mean cutting the wrong piece.
Step 10 — Export and Print
For workshop use, the Cut Optimizer offers two export formats:
- PDF export — generates a print-ready document with the cutting diagram for each sheet, the step-by-step cutting guide, a parts summary, and waste statistics. Print this and pin it to the workshop wall, or bring it to a lumber yard's cutting service
- SVG export — vector format for importing into CAD or CAM software, or for display at any scale without quality loss. Useful for CNC toolpath preparation or sharing with a panel shop
For most woodworkers, the PDF export is the primary deliverable. A printed cutting diagram on the wall is easier to reference than a phone screen when you're handling large sheets of plywood with sawdust on your hands. Many experienced users keep the printed diagram for reference and use the app's interactive guide on a tablet propped beside the saw for the step-by-step workflow.
Workflow Summary — From App to Saw
| Step | What You Do | Time Required |
|---|---|---|
| 1. Create project | Name project, choose units | 1 min |
| 2. Enter parts | Add name, dims, qty, grain, banding per part | 5–20 min (project-size dependent) |
| 3. Add stock panels | Full sheets + any offcuts, set priority | 2–5 min |
| 4. Configure settings | Kerf, trim allowance, units | 1–2 min |
| 5. Optimize | Tap Calculate — review diagrams and waste % | Under 5 seconds |
| 6. Export | PDF for print or SVG for CAD/CNC | 1 min |
| 7. Cut | Follow step-by-step guide at the saw | Project dependent |
Total planning time from opening the app to having a cutting plan ready: typically 10–30 minutes for a medium-complexity cabinet project with 20–40 parts. Compared to an hour or more for careful manual planning — and with significantly better waste results.
✅ Verdict: A cut list optimizer app on iPhone or iPad replaces the most mathematically demanding and error-prone part of woodworking project planning — sheet layout — with a process that takes minutes rather than hours and consistently outperforms manual planning on material efficiency. The learning curve is one or two projects at most; after that, using the Cut Optimizer app before every plywood project becomes as habitual as measuring twice before cutting.
📱 Ready to Run Your First Optimization?
Cut Optimizer is free to download for iPhone and iPad. Set up your first project in under ten minutes and see exactly how many sheets your project needs — and how to cut them with minimum waste. Supports metric and imperial, grain direction, saw kerf, edge banding, offcut stock, and PDF export.
Frequently Asked Questions
Is Cut Optimizer free to use on iPhone?
Cut Optimizer is free to download from the App Store and includes core functionality for creating projects, entering parts, and running optimizations. A premium in-app upgrade is available for advanced features. The free version is fully capable for most hobby woodworking and DIY projects, making it an easy first step even if you've never used a cut list optimizer before.
Can I use a cut list optimizer app for MDF and melamine as well as plywood?
Yes — the Cut Optimizer app works with any rectangular sheet material: plywood, MDF, melamine-faced particleboard, OSB, hardboard, solid timber boards, and more. For MDF and plain-colour melamine, you can set all parts to grain-free since these materials have no directional veneer, which typically improves the optimizer's material efficiency. For wood-grain melamine patterns, treat grain direction the same way as veneered plywood — lock visible parts, free hidden ones.
What is the maximum number of parts I can enter in a cut list optimizer app?
Cut Optimizer is designed to handle the full range of real-world woodworking projects — from simple two-part builds to complex multi-cabinet installations with 100+ parts across a dozen sheets. The optimization algorithm scales efficiently with project size. For very large commercial projects with hundreds of parts across many sheet types, the app's iCloud sync makes it practical to plan in stages, saving and refining between sessions across iPhone and iPad.
How accurate are the cutting diagrams generated by the app?
The cutting diagrams are mathematically precise — every dimension in the layout reflects your entered part dimensions plus exactly the kerf and trim allowances you specified. The accuracy of the physical cuts depends on accurately entering your real blade kerf (measured, not estimated) and using correct finished part dimensions. As long as your inputs are accurate, the output is a cutting plan you can follow directly at the saw with confidence. Measure your blade kerf with a caliper before your first project for the most reliable results.
Can I share my cutting plan with someone else — like a workshop or a contractor?
Yes. The PDF export from the Cut Optimizer app produces a complete, standalone cutting plan document — cutting diagrams, step-by-step guide, parts summary, and waste statistics — that can be shared via email, AirDrop, messaging apps, or any file sharing service. It's the most practical format for bringing to a lumber yard cutting service, sharing with a workshop partner, or keeping as a project record. The SVG export is useful for contractors or CNC shops needing a vector format for their own toolpath software.
Does the app work without an internet connection in the workshop?
Yes. All optimization calculations in the Cut Optimizer app run locally on your iPhone or iPad — no internet connection is required to enter parts, run the optimizer, view cutting diagrams, or use the step-by-step cutting guide. iCloud sync requires a connection to push changes to other devices, but your current project data is always available offline. This makes it fully functional in workshops with poor mobile reception or no Wi-Fi.
how to use cut list optimizer app iphonecut list optimizer app for iPadplywood cut optimizer iPhone tutorialCut Optimizer app how towoodworking app cut list planneroptimize plywood cuts iPhonecut list calculator app step by stepbest cut list app for woodworkers