How to Organize a Cut List for Multiple Thicknesses

How to Organize a Cut List for Multiple Sheet Thicknesses
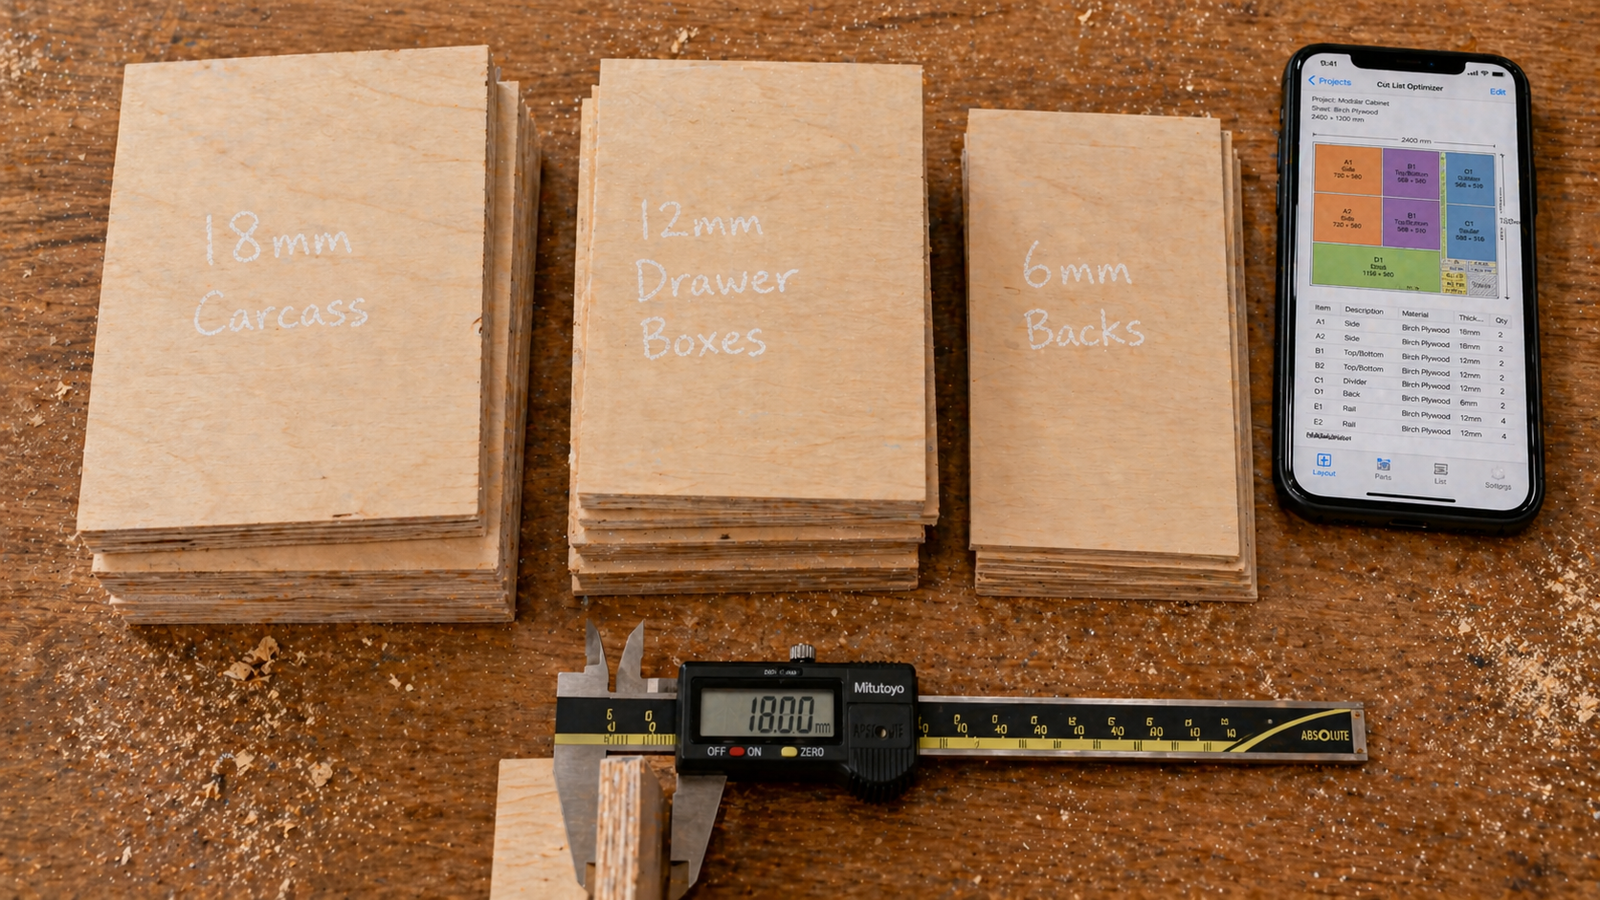
Most woodworking projects — and virtually all kitchen and furniture builds — involve more than one sheet thickness. A typical base cabinet run uses 18 mm plywood for the carcass panels, 12 mm plywood for drawer box sides, and 6 mm hardboard for cabinet backs. A bookcase might combine 18 mm for the main structure, 9 mm for the back panel, and 6 mm for the dust boards. The moment your project spans more than one thickness, your cut list organisation becomes critical: mix up your thickness groups, and the optimizer will try to fit a 12 mm drawer side onto an 18 mm panel sheet — producing a layout that looks correct on screen and fails completely at the saw. This intermediate guide covers exactly how to structure a cut list when working with multiple sheet thicknesses, how to group and label parts correctly, how to configure stock panels for each thickness, and how to use a cut list optimizer app to manage multi-thickness projects cleanly and efficiently.
📐 Manage Multiple Thicknesses in One Project
Cut Optimizer handles unlimited material types and thicknesses in a single project — each part assigned to its correct stock, each sheet optimised independently, all in one cutting plan PDF.
Why Multiple Thicknesses Need Separate Treatment
The reason cut list organisation matters so much in multi-thickness projects comes down to a simple physical reality: you cannot cut a part requiring 12 mm material from an 18 mm sheet. Different thicknesses are entirely separate materials, even when they are the same species and finish. A cutting optimizer that treats them as interchangeable produces nonsensical layouts. A cut list where they are mixed up without clear labelling leads to parts being cut from the wrong stock — a mistake that may not be discovered until assembly, at which point remakes and material waste are the only options.
The correct approach — and the one the Cut Optimizer app is designed to support — is to treat each distinct material and thickness combination as a completely separate material type, assign every part to its correct type, and optimise each type's parts against matching stock sheets independently. The result is a set of cutting diagrams grouped by thickness, with no cross-contamination between groups, that can be executed cleanly and sequentially at the saw.
The Most Common Multi-Thickness Project Combinations
Before building your cut list, it helps to know which thickness combinations appear most often in real woodworking projects. Here are the standard configurations for the most common project types:
| Project Type | Typical Thicknesses Used | Notes |
|---|---|---|
| Kitchen base cabinets | 18 mm, 12 mm, 6 mm | Carcass, drawer boxes, back panels |
| Bookcase / shelving unit | 18 mm, 9 mm or 6 mm | Main structure, back panel |
| Wardrobe / closet | 18 mm, 12 mm, 6 mm | Carcass, drawer boxes, back and base panels |
| Workshop storage cabinet | 18 mm, 12 mm | Main panels, lighter internal components |
| Bed frame with storage | 18 mm, 9 mm, 6 mm | Frame panels, slat base support, drawer bottoms |
| Media unit / TV cabinet | 18 mm, 12 mm, 6 mm | Carcass, shelves, back panel |
In each case, the thicker material handles the structural load-bearing panels, mid-weight material handles secondary structural elements like drawer boxes, and the thinnest material handles enclosure panels like backs and bottoms where weight and stiffness are less critical. Keeping these groups completely separated in your cut list is the foundation of clean multi-thickness planning.
Step 1 — Identify Every Thickness in Your Project Before Writing a Single Dimension
Before entering a single part dimension, walk through your project drawings and list every distinct material and thickness you will need. For each thickness, also note the material type — because 18 mm birch plywood and 18 mm melamine-faced particleboard are different materials even though they share a thickness, and a good optimizer treats them separately.
A thorough thickness audit for a typical kitchen cabinet project might look like this:
| Material Label | Thickness | Used For | Sheet Size |
|---|---|---|---|
| Birch Ply 18mm | 18 mm | Cabinet carcass panels, shelves | 2440 × 1220 mm |
| Birch Ply 12mm | 12 mm | Drawer box sides, fronts, backs | 2440 × 1220 mm |
| Hardboard 6mm | 6 mm | Cabinet backs, drawer bottoms | 2440 × 1220 mm |
This upfront mapping — before any part dimensions are entered — is the step that prevents the most common multi-thickness cut list errors. Every part you subsequently add to the list will be assigned to one of these defined material types, creating an unambiguous link between each part and the correct stock sheet.
💡 Tip: Use descriptive, unambiguous material labels that include both species and thickness — "Birch Ply 18mm" rather than just "Plywood" or "18mm". When your project has three thicknesses of the same material, a label like "Plywood" attached to a part leaves no indication of which sheet to cut it from. The extra few characters in the label name eliminate an entire category of cutting error.
Step 2 — Assign Every Part to Its Correct Material and Thickness
With your material types defined, go through every part in the project and assign each one to the correct material label. This is where a systematic approach pays off — working part by part through each cabinet or assembly, rather than trying to assign materials globally, prevents parts being missed or incorrectly grouped.
For a frameless kitchen cabinet, the assignment looks like this:
| Part | Material Assignment | Reason |
|---|---|---|
| Side panels (L & R) | Birch Ply 18mm | Primary structural panel; full carcass height |
| Top and bottom panels | Birch Ply 18mm | Structural horizontal; part of main carcass |
| Fixed shelves | Birch Ply 18mm | Load-bearing; needs full thickness for sag resistance |
| Drawer box sides | Birch Ply 12mm | Drawer box; 12mm is standard for drawer construction |
| Drawer box fronts and backs | Birch Ply 12mm | Same drawer box construction; matches side thickness |
| Drawer box bottoms | Hardboard 6mm | Slides into groove in drawer box sides; 6mm standard |
| Cabinet back panels | Hardboard 6mm | Enclosure only; nailed to back edges of carcass |
In the Cut Optimizer app, each part has a material field. When you select "Birch Ply 18mm" on a part, the optimizer knows to place that part only on 18 mm stock sheets. It will never put a 12 mm drawer side on an 18 mm sheet, regardless of how well it might fit geometrically, because the material types don't match.
Step 3 — Define Stock Panels for Each Thickness
For each material type you defined in Step 1, add a corresponding stock panel entry in the optimizer. The stock panel definition must match the material label on the parts that will be cut from it — this is the link the optimizer uses to assign parts to sheets.
For each stock panel, enter:
- Material name — exactly matching the material label on your parts (e.g. "Birch Ply 18mm")
- Sheet dimensions — standard 2440 × 1220 mm for most sheet goods; verify actual dimensions if using non-standard panels
- Quantity — enter a large number (e.g. 99) if you haven't bought yet; the optimizer will tell you exactly how many it uses
- Priority — if you have offcuts of any thickness from previous projects, add them as separate stock panel entries at higher priority than full sheets
A project with three material types requires three separate stock panel definitions — one for each thickness. This takes two minutes to set up and is what enables the optimizer to produce separate, clean cutting diagrams for each thickness group.
⚠️ Critical: Material labels on parts and stock panels must match exactly — character for character — for the optimizer to link them correctly. If your parts say "Birch Ply 18mm" and your stock panel says "Birch 18mm", the optimizer may treat them as different materials and leave parts unplaced. Set up your material labels once in a consistent format and use them identically on every part and every stock panel throughout the project.
Step 4 — Verify Actual vs. Nominal Thickness Before Calculating Dimensions
Multi-thickness projects are especially vulnerable to the nominal-vs-actual thickness problem. When your part dimensions depend on the thickness of an adjacent panel — as they almost always do in cabinet construction — using the wrong thickness value propagates errors through every related part in the cut list.
Before calculating any part dimensions that reference material thickness, measure every sheet material with a digital caliper:
| Nominal Thickness | Common Actual Range | Typical Error if Ignored |
|---|---|---|
| 18 mm (¾") | 17.5–18.2 mm | Up to 1 mm per joint; compounds across multiple panels |
| 12 mm (½") | 11.8–12.2 mm | Drawer box width off; slides don't fit |
| 9 mm (⅜") | 8.8–9.2 mm | Back panel groove width mismatch |
| 6 mm (¼") | 5.8–6.2 mm | Back panel loose in dado; drawer bottom rattles |
For cabinet construction, a 0.5 mm thickness error on the side panels means the top and bottom panels are 1 mm too wide or narrow (0.5 mm per side × 2 sides). That's a gap or a tight fit that affects every shelf and internal component. On drawer boxes, using nominal 12 mm when the actual is 11.8 mm means your drawer box is 0.4 mm wider than designed — potentially too wide to slide smoothly on the hardware. Measure first. Enter actual dimensions into your cut list. Everything else follows correctly from there.
Step 5 — Organise Your Cut List Sections by Thickness Group
In a spreadsheet or paper cut list, organise parts into clearly labelled sections — one section per material type and thickness. This makes the list easier to review before entering it into the optimizer, and easier to cross-reference during and after cutting.
A well-organised multi-thickness cut list for a wardrobe project might be structured like this:
SECTION A — 18 mm Birch Plywood (Carcass)
- Side panels, top/bottom panels, fixed shelves, kick board
SECTION B — 12 mm Birch Plywood (Drawer Boxes)
- Drawer sides, drawer fronts, drawer backs
SECTION C — 6 mm Hardboard (Backs and Bases)
- Cabinet back panels, drawer bottoms
This visual grouping makes it immediately obvious if a part has been assigned to the wrong section. A 6 mm drawer bottom mistakenly entered under Section A (18 mm) would look dimensionally out of place among the large carcass panels — a formatting-level sanity check that catches data entry errors before they reach the optimizer.
Step 6 — Run Optimizations Correctly in the App
In the Cut Optimizer app, all material types and thickness groups are entered into a single project and optimised simultaneously. The app handles the separation internally — it matches each part to its assigned material type and places it only on stock sheets of that matching type. You don't need to run separate optimizations for each thickness; one tap on Calculate processes all thickness groups at once and produces separate cutting diagram sets for each material type.
After running the optimization, review the output with these multi-thickness specific checks:
- Confirm sheet counts per material — verify the number of 18 mm, 12 mm, and 6 mm sheets matches your rough expectations. A single sheet of 12 mm plywood for ten drawer boxes is plausible; one sheet for forty drawer parts is a sign something is wrong.
- Check that no small parts appear on large-part sheets — a 6 mm back panel appearing on an 18 mm carcass sheet indicates a material assignment error. Find the part in the parts list and correct its material label.
- Verify waste percentages are plausible per material — very high waste on one material group (say, 40% on the 12 mm sheet) often means a few large parts are being cut from an inefficiently sized sheet, or that grain direction is over-constrained on that group. Try freeing grain on hidden parts in that group and re-running.
- Review the materials summary — the summary at the end of the cutting plan PDF shows sheets required per material type. Use this as your purchasing list; buy exactly these quantities.
Common Multi-Thickness Cut List Mistakes
| Mistake | What Goes Wrong | Prevention |
|---|---|---|
| Assigning parts to "Plywood" without thickness | Optimizer can't distinguish 18 mm from 12 mm parts; mixes them on wrong sheets | Always include thickness in material label: "Birch Ply 18mm" not "Plywood" |
| Mismatched material label between parts and stock | Parts left unplaced; optimizer can't find matching stock | Copy-paste material names from stock panel definitions into each part entry |
| Using nominal thickness in dimension calculations | Interior dimensions wrong; parts don't fit at assembly | Measure every sheet with a caliper before calculating any dimension that references panel thickness |
| Buying all thicknesses before optimizing | Wrong quantities; over- or under-buying one or more thickness groups | Run the optimizer first; use the materials summary sheet count as the purchase order |
| Cutting all thicknesses in the same workshop session without separating plans | Parts from different thickness groups get mixed up and mislabelled | Cut one thickness group completely, label and set aside all parts, then move to the next group |
| Setting the same kerf value for all thickness groups | Minor inaccuracy if different blades are used for different thicknesses | If using the same blade for all cuts (most common), one kerf value is correct; if blade-switching, update kerf before each group's optimization |
Workshop Sequencing for Multi-Thickness Projects
Once you have your multi-thickness cutting plan ready — whether as an interactive guide in the Cut Optimizer app or as a printed PDF — the most practical workshop approach is to cut each thickness group as a complete, separate session:
- Cut all 18 mm parts first — work through every 18 mm sheet from the cutting plan, labelling each part immediately after cutting. Stack all cut 18 mm parts together in a designated area.
- Set aside the 18 mm material and bring out the 12 mm sheets — clear the cutting area physically before moving to the next thickness. This prevents any risk of confusing stock panels of different thicknesses mid-session.
- Cut all 12 mm parts — repeat the same label-immediately process. Stack completed 12 mm parts separately from the 18 mm group.
- Cut all 6 mm or thin parts last — thin sheet goods like 6 mm hardboard are the most fragile and prone to flexing or damage during handling; cutting them last minimises the time they spend in a busy workshop where they might be knocked off a pile.
This sequential approach — one thickness at a time, fully complete before moving on — is the single most effective way to prevent parts from different thickness groups being mixed up, mislabelled, or cut from the wrong stock. It also makes the cutting session mentally simpler: you're executing one cutting plan at a time, not mentally switching between three simultaneously.
✅ Verdict: Multi-thickness cut list organisation comes down to one principle: treat every distinct material and thickness combination as a completely separate material, from the first label definition to the last cut. Define descriptive material labels before entering any parts, assign every part precisely, add matching stock panels for each type, and cut one thickness group at a time in the workshop. The Cut Optimizer app handles the mathematics of each group's layout simultaneously — your job is to keep the groupings clean and consistent so the optimizer always has unambiguous information to work with.
📱 Handle Every Thickness in One Project — Cleanly
Cut Optimizer supports unlimited material types and thicknesses in a single project. Assign parts to their correct material, add matching stock panels, and the app produces separate, clean cutting diagrams for every thickness group — with a single PDF covering the entire project. Free for iPhone and iPad.
Frequently Asked Questions
Can a cut list optimizer handle multiple plywood thicknesses in one project?
Yes — a well-designed cut list optimizer app like Cut Optimizer handles unlimited material types and thicknesses in a single project. Each part is assigned a material type that includes its thickness, and each stock panel is defined with a matching material type. The optimizer places parts only on matching stock sheets, producing separate cutting diagram sets for each thickness group — all within one project and one exported PDF. You don't need to run separate projects for different thicknesses.
How do I make sure the optimizer doesn't mix up parts of different thicknesses?
The key is consistent, descriptive material labels that include thickness — "Birch Ply 18mm" rather than just "Plywood" or "18mm." Every part and every stock panel must use exactly the same label for its material type. The optimizer matches parts to stock panels by material label — if a part says "Birch Ply 18mm" and the stock panel says "Birch 18mm," the optimizer may treat them as different materials and leave the part unplaced. Set up your material labels once in a consistent format, then copy-paste them to avoid typos when assigning parts. The Cut Optimizer app uses a material selection dropdown for exactly this reason — you pick from a defined list rather than typing free text.
Should I run a separate optimization for each sheet thickness?
No — running everything as a single project in the Cut Optimizer app is both faster and produces better results than running separate projects per thickness. The app internally separates parts by material type during optimization, so you get the clean per-thickness grouping without any manual project splitting. Running separate projects also makes it harder to get an accurate total materials summary and sheet count for purchasing — one project gives you a single, unified materials list.
What is the most common thickness combination for kitchen cabinet projects?
The standard combination for a frameless kitchen with drawers is 18 mm plywood or MFC for the main carcass panels and shelves, 12 mm plywood for the drawer box sides, fronts, and backs, and 6 mm hardboard or thin plywood for cabinet back panels and drawer bottoms. Some builders use 15 mm for the carcass instead of 18 mm to reduce weight on wall cabinets, and some use 9 mm instead of 6 mm for back panels where additional rigidity is needed. Whatever combination you use, the process for organising the cut list is identical — define material labels with thickness, assign parts, add matching stock, and optimise.
Does grain direction work the same way across different thicknesses?
Yes — grain direction settings apply per part regardless of thickness. For appearance-grade visible surfaces, lock grain direction on each part; for hidden structural or enclosure parts, set them free for rotation. The one practical difference with thinner materials (6–9 mm) is that grain direction is often irrelevant even on visible surfaces, because thin panels like back boards and drawer bottoms are rarely the focus of visual attention. Freeing grain on all thin-material parts typically improves optimizer efficiency on those sheets with no aesthetic cost. The Cut Optimizer app applies grain constraints independently per part, so you can lock grain on 18 mm carcass panels while setting all 6 mm back panels as free in the same project.
How do I buy the right quantities of each thickness without over-ordering?
Enter all parts for the complete project into the Cut Optimizer app with a large stock quantity (e.g. 99 sheets) for each material type, then run the optimisation. The materials summary in the results — and in the exported PDF — shows the exact number of sheets used per material type. This is your purchase order. Buying precisely what the optimizer calculates is almost always correct, because the optimizer accounts for kerf, trim allowances, and grain direction constraints in its sheet count. There is no need for a 20% material buffer when you have an accurate optimised layout.
cut list multiple plywood thicknessesorganize cut list different sheet thicknessesplywood 18mm 12mm 6mm cut listcut list optimizer multiple materialscabinet cut list thickness groupshow to separate cut list by thicknessnominal vs actual plywood thickness cut listmulti-thickness woodworking project planner