How to Make a Cut List for a Woodworking Project (Step by Step)

How to Make a Cut List for a Woodworking Project (Step by Step)
A cut list is one of the most underrated tools in a woodworker's kit. Whether you're building a set of kitchen cabinets, a bookshelf, or a simple storage bench, having a well-structured cut list before you pick up the saw means fewer mistakes, less wasted material, and a smoother build from start to finish. In this step-by-step guide, you'll learn exactly how to create an accurate cut list — and how a cut list optimizer can take that list and turn it into an optimized cutting plan in seconds.
🚀 Skip the Spreadsheet — Optimize Your Cut List on iPhone
Cut Optimizer turns your part list into a low-waste cutting diagram in seconds. Supports kerf, grain direction, edge banding, and PDF/SVG export.
What Is a Cut List in Woodworking?
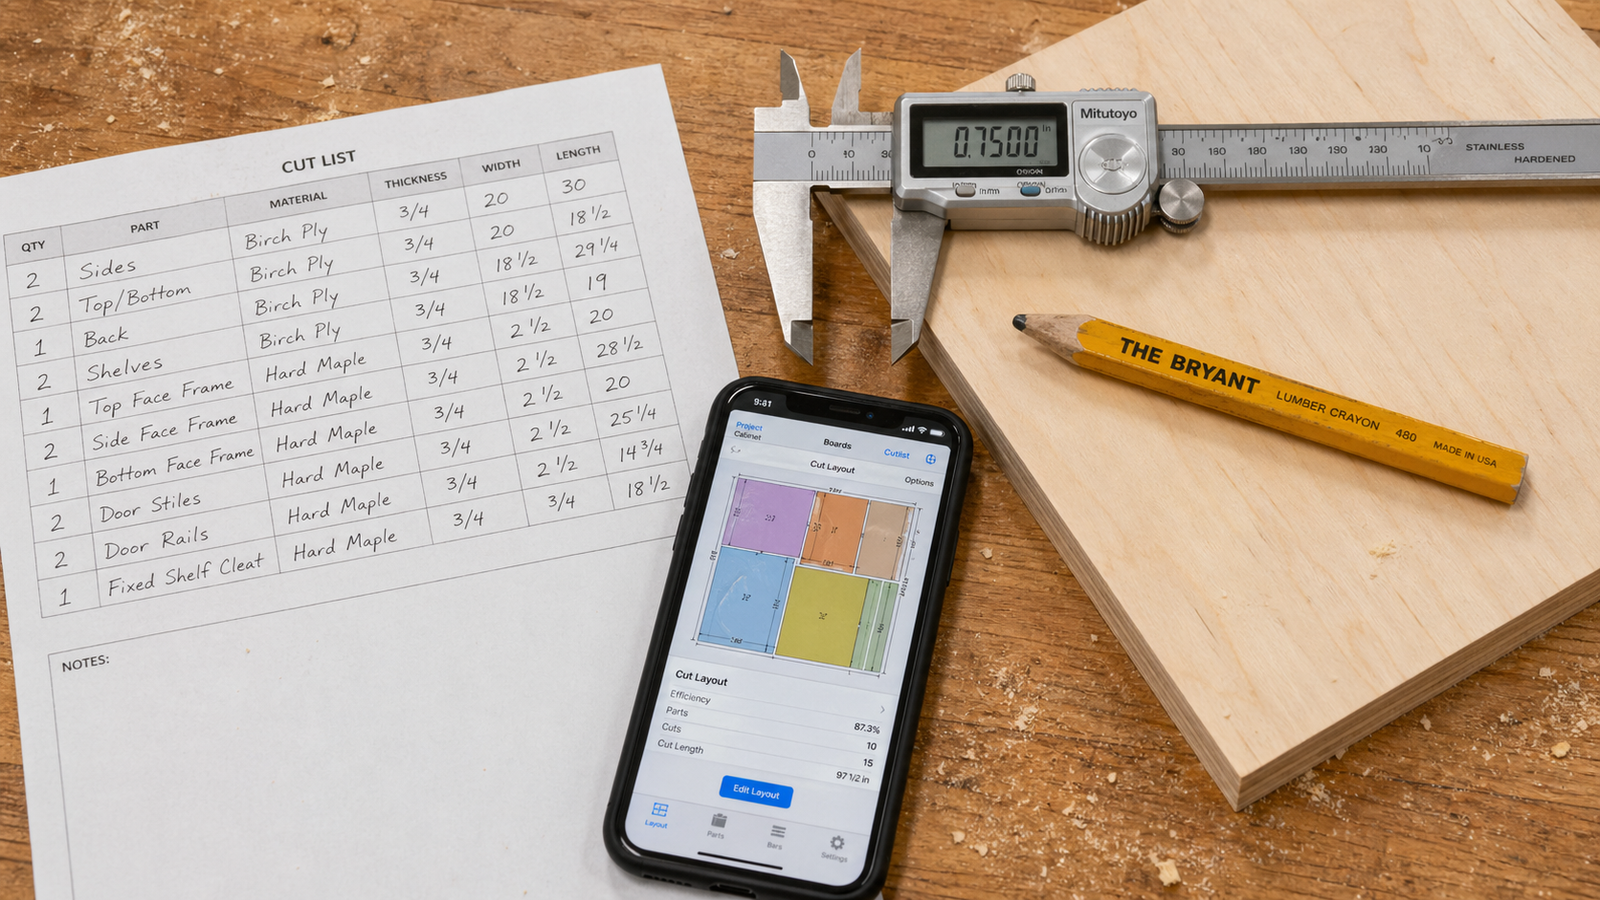
A cut list (also called a cut sheet or parts list) is a document that lists every individual piece you need to cut for a project, along with its dimensions, material type, quantity, and any special notes about grain direction or edge treatment. Think of it as a shopping list combined with a blueprint — it tells you exactly what pieces to cut, from which materials, and how many of each.
A good cut list eliminates the need to re-measure constantly during the build. It also forms the input for a cut list optimizer app, which automatically arranges your parts on stock sheets to minimize offcuts and waste.
What You Need Before You Start
Before building your cut list, gather the following:
- Project drawings or plans — even a rough sketch with dimensions is enough
- Final dimensions of every part — width, length, and thickness for each piece
- Material information — species, type (plywood, MDF, melamine, solid wood), and available sheet sizes
- Joinery method — dadoes, rabbets, pocket screws, and mortises all affect final part sizes
- A spreadsheet, app, or pen and paper to record everything
💡 Pro Tip: Always complete your project design before starting the cut list. Changing a dimension mid-list forces you to ripple updates through every related part — a time-consuming and error-prone process.
Step 1 — List Every Part in Your Project
Go through your plans and identify every single component you need to cut. Give each part a clear, descriptive name — "left side panel," "top shelf," "drawer bottom" — rather than generic labels like "piece A." This prevents confusion on the workshop floor, especially on larger projects with 30+ parts.
For a simple cabinet box, your list might start like this:
| Part Name | Qty | Width | Length | Thickness | Material |
|---|---|---|---|---|---|
| Side Panel | 2 | 400 mm | 720 mm | 18 mm | Birch Plywood |
| Top / Bottom Panel | 2 | 364 mm | 600 mm | 18 mm | Birch Plywood |
| Back Panel | 1 | 600 mm | 720 mm | 6 mm | Hardboard |
| Shelf | 2 | 364 mm | 564 mm | 18 mm | Birch Plywood |
Step 2 — Record the Correct Dimensions
This is where most beginners make mistakes. Your cut list must use finished dimensions — the final size each piece needs to be after cutting, not the rough size you'll start with. If a part will receive edge banding that adds 0.5 mm per banded edge, your cut dimension needs to account for that.
Follow these rules for consistent, accurate dimensions:
- Width — the shorter face dimension (perpendicular to grain for plywood)
- Length — the longer face dimension (parallel to grain for plywood)
- Thickness — the depth of the material (e.g. 18 mm, ¾")
When using a plywood cut optimizer, you enter these finished dimensions directly and the software handles kerf compensation automatically — so your physical cuts always match your plan.
Step 3 — Group Parts by Material and Thickness
Never mix parts of different thicknesses on the same sheet during optimization. Group your parts by:
- Material type (plywood, MDF, melamine, hardboard)
- Thickness (6 mm, 12 mm, 18 mm, etc.)
- Sheet size (4×8 ft / 2440×1220 mm is standard, but not universal)
This grouping is critical when you feed your list into a cut list calculator app — the optimizer will only place parts onto sheets of the correct matching material and thickness, ensuring layouts that are actually buildable.
Step 4 — Account for Saw Kerf
Saw kerf is the material removed by the blade during each cut. A standard 10" table saw blade removes approximately 3 mm (⅛") of material per pass. This sounds small, but across a layout with 20+ cuts on a single sheet, unaccounted kerf can add up to several centimetres of lost material — potentially causing parts to come out undersized.
Manual cut planning on graph paper rarely accounts for kerf accurately. A good cut list optimizer has a dedicated kerf field where you enter your blade thickness once, and it automatically reserves that space between every part in the cutting layout. Common kerf values:
| Saw Type | Typical Kerf |
|---|---|
| Standard 10" table saw blade | 3 mm (⅛") |
| Thin-kerf table saw blade | 2.4 mm (3/32") |
| Track saw / circular saw | 2.5–3 mm |
| CNC router bit (¼") | 6.35 mm (¼") |
⚠️ Warning: Forgetting kerf is the single most common cut list mistake. On a 30-cut layout with a 3 mm kerf, you're losing nearly 90 mm (3.5") of usable material — enough to ruin a final part completely.
Step 5 — Note Grain Direction
For plywood and veneered sheet goods on visible surfaces, grain direction controls which way the face veneer runs on the finished part. Getting this wrong on a cabinet door front or a furniture top is a costly and frustrating mistake.
In your cut list, mark each part's required grain direction:
- Grain along the length — most common for cabinet sides, doors, and drawer fronts
- Grain along the width — sometimes needed for tops and shelves
- Free / no preference — for structural or hidden parts like cabinet backs and drawer bottoms
When you enter these settings into the Cut Optimizer iPhone app, it will lock grain-sensitive parts in the correct orientation and only rotate parts where grain direction is marked as free — maximizing yield without compromising aesthetics.
Step 6 — Add Edge Banding Requirements
If you're using melamine, veneer plywood, or other faced sheet goods, the exposed edges of cut parts typically need edge banding applied. Recording which edges need banding per part is important for two reasons:
- It affects cut dimensions — edge banding adds material thickness (typically 0.4–2 mm per edge), so the cut part must be slightly undersized to compensate
- It helps you calculate total banding length — so you can order or cut the right amount of tape
A dedicated cut list optimizer like Cut Optimizer lets you select which edges of each part get banding and automatically calculates compensated cut sizes and total banding length per material — saving you a separate manual calculation.
Step 7 — Include Your Stock Panels
Your cut list is only half of the equation. You also need to define the stock sheets you'll be cutting from:
- Standard sheet size (e.g. 2440 × 1220 mm / 8 × 4 ft)
- How many full sheets you have available
- Any offcuts from previous projects that can be used first
Adding offcuts as usable stock is one of the most effective ways to reduce material cost on a project. A cut list calculator app with stock priority settings will automatically try to fill your offcut pieces before opening a new full sheet.
Step 8 — Run the Optimizer and Review the Layout
Once your cut list is complete — every part named, dimensioned, material assigned, grain noted, and stock defined — you're ready to optimize. This is where manual cut planning falls apart and software truly shines.
Manually arranging 30+ parts across several sheets of plywood to minimize waste is an NP-hard mathematical problem. Even experienced cabinetmakers waste 15–25% of material when planning by hand. A 2D bin-packing optimizer can routinely bring waste below 8–10%.
With the Cut Optimizer app, you tap Calculate and within seconds you get:
- A colour-coded cutting diagram for each sheet
- Waste percentage and total cut statistics
- A step-by-step cutting guide you can follow right at the saw
- PDF or SVG export to print or share with your team
✅ Verdict: Manual cut planning on graph paper works for simple 2–3 part projects. For anything more complex — especially cabinets, closets, or furniture with 10+ parts — a cut list optimizer saves significant time, money, and material. The math simply cannot be done reliably by hand at scale.
Step 9 — Mark Your Parts and Start Cutting
Before the first cut, use chalk, a lumber crayon, or low-tack tape to mark each part's name or code directly on the wood. This matches your cut list and prevents the classic mistake of cutting two left sides instead of a left and right.
Follow these workshop-tested tips for a smooth cutting session:
- Cut large pieces first — breaking down full sheets into rough sizes before trimming to exact dimensions keeps the sheet stable and makes handling safer
- Follow the cutting guide in sequence — optimizer apps generate step-by-step cut instructions in the optimal order; follow them rather than eyeballing
- Double-check each dimension before committing — cross-reference your cut list after every cut, not just before
- Save useful offcuts — label them with their dimensions and store them flat so they're ready for the next project
Common Cut List Mistakes to Avoid
- Using nominal instead of actual dimensions — a ¾" sheet is actually 18 mm (0.703"), not 19.05 mm; always verify with a caliper
- Forgetting joinery offsets — a dado or rabbet removes material that affects the adjoining part's fit; account for this in finished dimensions
- Mixing thicknesses on one sheet — an optimizer will flag this, but a manual plan might miss it
- Ignoring the factory edge — most plywood sheets have a rough or slightly bowed factory edge; many pros trim 5–10 mm off one long and one short edge before cutting parts
- Not leaving a trim allowance — add a small trim allowance (typically 5 mm per trimmed edge) in your stock panel settings so the optimizer doesn't try to place parts right at the sheet edge
Cut List Template — Free Download Reference
For those who prefer working in a spreadsheet before moving to an optimizer, a basic cut list template should include these columns:
| Column | What to Record |
|---|---|
| Part Name | Descriptive label (e.g. "Left Side Panel") |
| Quantity | Number of identical pieces needed |
| Width | Finished width in mm or inches |
| Length | Finished length in mm or inches |
| Thickness | Material thickness (e.g. 18 mm, ¾") |
| Material | Type and species (e.g. "18 mm Birch Plywood") |
| Grain Direction | Along length / along width / free |
| Edge Banding | Which edges need banding (L/R/T/B) |
| Notes | Joinery, finish notes, or special instructions |
Once your spreadsheet is complete, you can enter these values directly into the Cut Optimizer app and generate an optimized cutting layout with waste statistics and a step-by-step guide — far faster than arranging parts manually on graph paper.
📱 Ready to Optimize Your First Cut List?
Cut Optimizer for iPhone and iPad takes your parts list and turns it into a low-waste, step-by-step cutting plan. Supports metric and imperial, grain direction, saw kerf, edge banding, and PDF export. Built for woodworkers, cabinet makers, and serious DIYers.
Frequently Asked Questions
What is the difference between a cut list and a cut sheet?
The terms are used interchangeably by most woodworkers. A cut list typically refers to the document listing all parts and their dimensions, while a cut sheet can also mean the physical or digital diagram that shows how those parts are arranged on a stock sheet. In practice, most software tools — including the Cut Optimizer app — produce both: a parts list and an optimized cutting diagram for each sheet.
Do I need a cut list for small woodworking projects?
For very simple projects with two or three pieces, a cut list may feel like overkill — a rough sketch with dimensions is often enough. But for anything with more than five parts, different materials, or repeated pieces (like shelves or drawer boxes), a cut list pays for itself in time saved and mistakes avoided. Even a quick one on paper beats holding measurements in your head.
What is the best format for a woodworking cut list?
The most practical format is a table with columns for part name, quantity, width, length, thickness, material, grain direction, and edge banding requirements. A spreadsheet (Excel or Google Sheets) works well for recording the list, and a dedicated cut list app is best for optimizing and generating cutting diagrams from that data.
How do I account for wood movement in a cut list?
For solid wood projects, wood movement (expansion and contraction due to humidity changes) is a real concern. In your cut list, this typically means sizing panels slightly undersize in width to allow for expansion, and using joinery that permits movement (like slotted screws for tabletops). For plywood and MDF, cross-laminated construction means movement is negligible and does not usually need to be factored into cut list dimensions.
Can a cut list optimizer handle multiple different sheet sizes?
Yes. Good cut list optimizer apps — including Cut Optimizer — let you add multiple stock sheet sizes (for example, full 2440×1220 mm sheets alongside smaller offcuts) and assign priorities so that offcuts are used up before opening a new full sheet. Parts are automatically matched to the correct material and thickness.
What is the biggest mistake people make when building a cut list?
The most common and costly mistake is using nominal dimensions instead of actual finished dimensions — particularly for plywood thickness. A sheet sold as ¾" birch plywood typically measures closer to 18 mm (0.709"), not 19.05 mm. If your cut list assumes 19.05 mm and your dadoes are routed to match, every shelf will fit too loosely. Always verify actual material dimensions with a caliper before building your list.
how to make a cut list for woodworkingwoodworking cut list templateplywood cut list step by stepsaw kerf cut listgrain direction plywood cut listcut list optimizer app iPhonehow to reduce plywood wastecabinet making cut list