How to Build Kitchen Cabinets with a Cut List — Beginner

How to Build Kitchen Cabinets with a Cut List (Beginner Guide)
Building your own kitchen cabinets from scratch is one of the most rewarding — and most cost-effective — projects a woodworker can take on. A professionally installed kitchen can cost $15,000–$50,000 or more; the same layout built in your own workshop using plywood and a good cut list typically comes in at a fraction of that figure, with results that are structurally superior to most flat-pack alternatives. The key to making it achievable as a beginner is breaking the project into manageable stages — and the most important stage, the one that controls everything that follows, is building an accurate cut list before you buy a single sheet of wood. This beginner's guide walks you through the complete process: planning your cabinet dimensions, building a cut list for a standard frameless base cabinet box, running it through a cut list optimizer, and cutting and assembling your first cabinet carcass.
🪵 Plan Your Kitchen Cabinet Cuts Before You Buy a Single Sheet
Cut Optimizer turns your cabinet parts list into an optimised cutting plan with exact sheet count, waste percentage, and a step-by-step guide to follow at the saw — in under five minutes.
Understanding the Two Main Cabinet Types
Before building a cut list, you need to decide which cabinet construction style you're using. Most beginner-built kitchens use one of two approaches:
Frameless (European-Style) Cabinets
The box is the cabinet. The carcass — typically made from 18 mm plywood or melamine-faced particleboard — forms all structural faces, and doors and drawer fronts attach directly to the box edges using European-style concealed hinges. This is the simpler construction method for beginners: fewer parts, faster assembly, and the cut list is straightforward to build. All examples in this guide use frameless construction.
Face-Frame Cabinets
A solid wood frame (typically 19–25 mm hardwood) is glued and nailed to the front of the carcass, concealing the plywood edges and providing a traditional furniture appearance. The face frame adds parts and joinery complexity to the cut list, but is preferred in many North American kitchen styles. Once you're comfortable building frameless boxes, adding face frames is a natural next step.
💡 Beginner Recommendation: Build your first kitchen in frameless style. Fewer parts, simpler joinery, and the cut list is easier to manage in a cut list optimizer app. You can achieve a fully professional result with concealed hinges, integrated drawer systems, and handleless doors entirely within the frameless method.
Standard Kitchen Cabinet Dimensions
Before writing a single part dimension, establish your cabinet heights, widths, and depths. Standard North American and European kitchen dimensions provide a starting framework — adjust for your specific kitchen layout, ceiling height, and appliance specifications.
| Cabinet Type | Standard Height | Standard Depth | Typical Width Range |
|---|---|---|---|
| Base cabinet (box only) | 720 mm / 28½" | 560 mm / 22" | 300–900 mm |
| Wall cabinet (box only) | 700 mm / 27½" | 320 mm / 12½" | 300–900 mm |
| Tall / pantry cabinet | 2100–2400 mm | 560 mm / 22" | 300–600 mm |
| Base cabinet with drawers | 720 mm / 28½" | 560 mm / 22" | 400–600 mm |
These heights are for the carcass box only — they do not include the countertop. Standard finished countertop height is 900 mm (36"), which accommodates an 18 mm toe-kick plinth, 720 mm box, and 30 mm countertop with 132 mm of adjustable leg height below.
The Anatomy of a Frameless Base Cabinet Box
A standard frameless base cabinet carcass consists of exactly six parts, all cut from the same sheet material (typically 18 mm plywood or melamine-faced particleboard):
- Left side panel — full height of the box, full depth
- Right side panel — identical to the left side panel
- Top panel — spans between the side panels, set back slightly from the front edge
- Bottom panel — identical to the top panel; sits above the toe-kick space
- Back panel — cut from thinner material (typically 6–8 mm hardboard or plywood) and fits into a dado routed into the inside face of all four main panels, or is simply nailed and glued flush to the back edges
- Fixed shelf (optional) — one or more shelves spanning between side panels; can be fixed or adjustable on shelf pins
That's it. A base cabinet box is six parts. The elegance of frameless construction is that once you've mastered one box, you simply repeat it at different widths for every cabinet in the run. An entire kitchen of ten cabinets is ten variations of the same six-part box — which is exactly why a cut list optimizer is so valuable: it handles the repetition and sheet nesting across all ten boxes simultaneously.
How to Calculate Part Dimensions for a Base Cabinet
Let's work through a concrete example: a 600 mm wide frameless base cabinet box, 720 mm tall, 560 mm deep, built from 18 mm birch plywood with a 6 mm hardboard back panel. This is the most common base cabinet size — it suits a standard 600 mm wide drawer unit, door cabinet, or pull-out bin.
Side Panels (× 2)
The side panels run the full height and full depth of the box:
- Width (depth of box): 560 mm
- Length (height of box): 720 mm
- Quantity: 2
- Material: 18 mm birch plywood
- Grain direction: Along length (vertical grain on the visible side)
Top and Bottom Panels (× 2)
The top and bottom panels span between the side panels. In frameless construction, the side panels typically run full height and the top and bottom panels fit between them — so their width is the cabinet's interior width:
- Interior width: 600 mm (overall) − 18 mm (left side) − 18 mm (right side) = 564 mm
- Width (depth of box): 560 mm − 6 mm (back panel thickness) − 16 mm (setback from front for door clearance) = 538 mm
- Quantity: 2
- Material: 18 mm birch plywood
- Grain direction: Along length (grain runs front to back for structural support)
💡 Important: The exact setback of the top and bottom panels from the front edge depends on your door hinging system. European concealed hinges (Blum, Grass, Häfele) typically require a 16 mm setback from the front face of the side panel to the front edge of the top/bottom panel. Always verify the setback requirement for your specific hinge model before finalising top and bottom panel depth in your cut list.
Back Panel (× 1)
The back panel fits flush to the back edges of all four main panels:
- Width: 600 mm − 18 mm − 18 mm = 564 mm (interior width, same as top/bottom)
- Length: 720 mm − 18 mm (top) − 18 mm (bottom) = 684 mm (interior height)
- Quantity: 1
- Material: 6 mm hardboard
- Grain direction: Free (back panel is hidden; allow rotation in optimizer)
Fixed Shelf (× 1, optional)
- Width: 564 mm (interior width)
- Length: 538 mm (same depth as top/bottom panels)
- Quantity: 1 (or more if multiple shelves needed)
- Material: 18 mm birch plywood
- Grain direction: Along length (structural — grain along the span for sag resistance)
Complete Cut List for a 600 mm Base Cabinet
| Part Name | Qty | Width | Length | Thickness | Material | Grain |
|---|---|---|---|---|---|---|
| Side Panel | 2 | 560 mm | 720 mm | 18 mm | Birch Plywood | Along Length |
| Top Panel | 1 | 538 mm | 564 mm | 18 mm | Birch Plywood | Along Length |
| Bottom Panel | 1 | 538 mm | 564 mm | 18 mm | Birch Plywood | Along Length |
| Fixed Shelf | 1 | 538 mm | 564 mm | 18 mm | Birch Plywood | Along Length |
| Back Panel | 1 | 564 mm | 684 mm | 6 mm | Hardboard | Free |
This is the complete cut list for one 600 mm base cabinet. For a full kitchen run, you repeat this calculation for every cabinet at its specific width, keeping height and depth consistent across all base units. Enter all parts from all cabinets into the Cut Optimizer app simultaneously — the optimizer nests parts from different cabinets on the same sheets wherever they fit, minimising total sheet count across the entire kitchen.
Scaling Up — Cut List for a Full Kitchen Run
A typical beginner kitchen might include four to eight base cabinets of different widths. The process is the same for each — only the width changes. Here's how the parts scale across three common cabinet widths:
| Cabinet Width | Side Panel (W × L) | Top/Bottom Panel (W × L) | Back Panel (W × L) | 18 mm Parts Total |
|---|---|---|---|---|
| 400 mm | 560 × 720 mm (×2) | 538 × 364 mm (×3) | 364 × 684 mm (×1) | 5 |
| 600 mm | 560 × 720 mm (×2) | 538 × 564 mm (×3) | 564 × 684 mm (×1) | 5 |
| 900 mm | 560 × 720 mm (×2) | 538 × 864 mm (×3) | 864 × 684 mm (×1) | 5 |
Notice that every cabinet has the same side panels regardless of width — a tremendous advantage when optimising material. All side panels from all base cabinets are identical parts, which means the optimizer can fill entire rows of a sheet with them. A kitchen with six base cabinets has twelve identical side panels — and a good cut list optimizer will pack them tightly and efficiently across the minimum number of sheets.
Edge Banding for Kitchen Cabinets
In a frameless kitchen, the front edges of all side panels, shelves, and top/bottom panels are visible when doors and drawers are open. These edges need to be covered with edge banding — a thin strip of matching veneer or melamine tape ironed or glued onto the exposed plywood edge. Recording which edges need banding in your cut list is important for two reasons:
- It affects cut dimensions if your banding adds thickness (typically 0.4–2 mm per edge)
- It lets the optimizer calculate total banding length per material, so you know exactly how much tape to buy
For a standard frameless base cabinet built from birch plywood, the banding requirements are:
- Side panels — front edge only (the edge visible when doors are open)
- Top and bottom panels — front edge only
- Fixed shelf — front edge only
- Back panel — no banding required (hidden inside the cabinet)
In the Cut Optimizer app, select which edges require banding per part when entering your parts list. The app tracks total banding length across all parts and all cabinets, producing a summary you can use when ordering supplies.
Optimising the Full Kitchen Cut List
Once you've built the cut list for every cabinet in the kitchen — typically 30–80 parts for a complete base unit run — enter them all into the Cut Optimizer app as a single project. Add your stock panels (standard 2440 × 1220 mm sheets of 18 mm birch plywood, plus a separate stock type for the 6 mm hardboard back panels), configure your saw kerf (3 mm for a standard table saw), set trim allowances, and run the optimization.
The optimizer will cross-nest parts from different cabinets on the same sheets — placing a 900 mm cabinet's top panel alongside a 400 mm cabinet's side panels if they fit together more efficiently than keeping each cabinet's parts on separate sheets. This cross-nesting is something a human planner almost never does manually (it feels disorganised), but it's precisely what reduces sheet count on a full kitchen project. The cut list optimizer keeps track of which part belongs to which cabinet in the labels and cutting guide — you don't need to.
⚠️ Before You Buy: Always run the full kitchen cut list through the optimizer before purchasing sheets. The sheet count the optimizer produces is your exact material order — not an estimate, not a rough figure with 20% added "just in case." Over-buying plywood is expensive; running short mid-build and needing to colour-match a new lot is worse. Know your exact number before you go to the lumber yard.
Assembly — Building the Cabinet Box
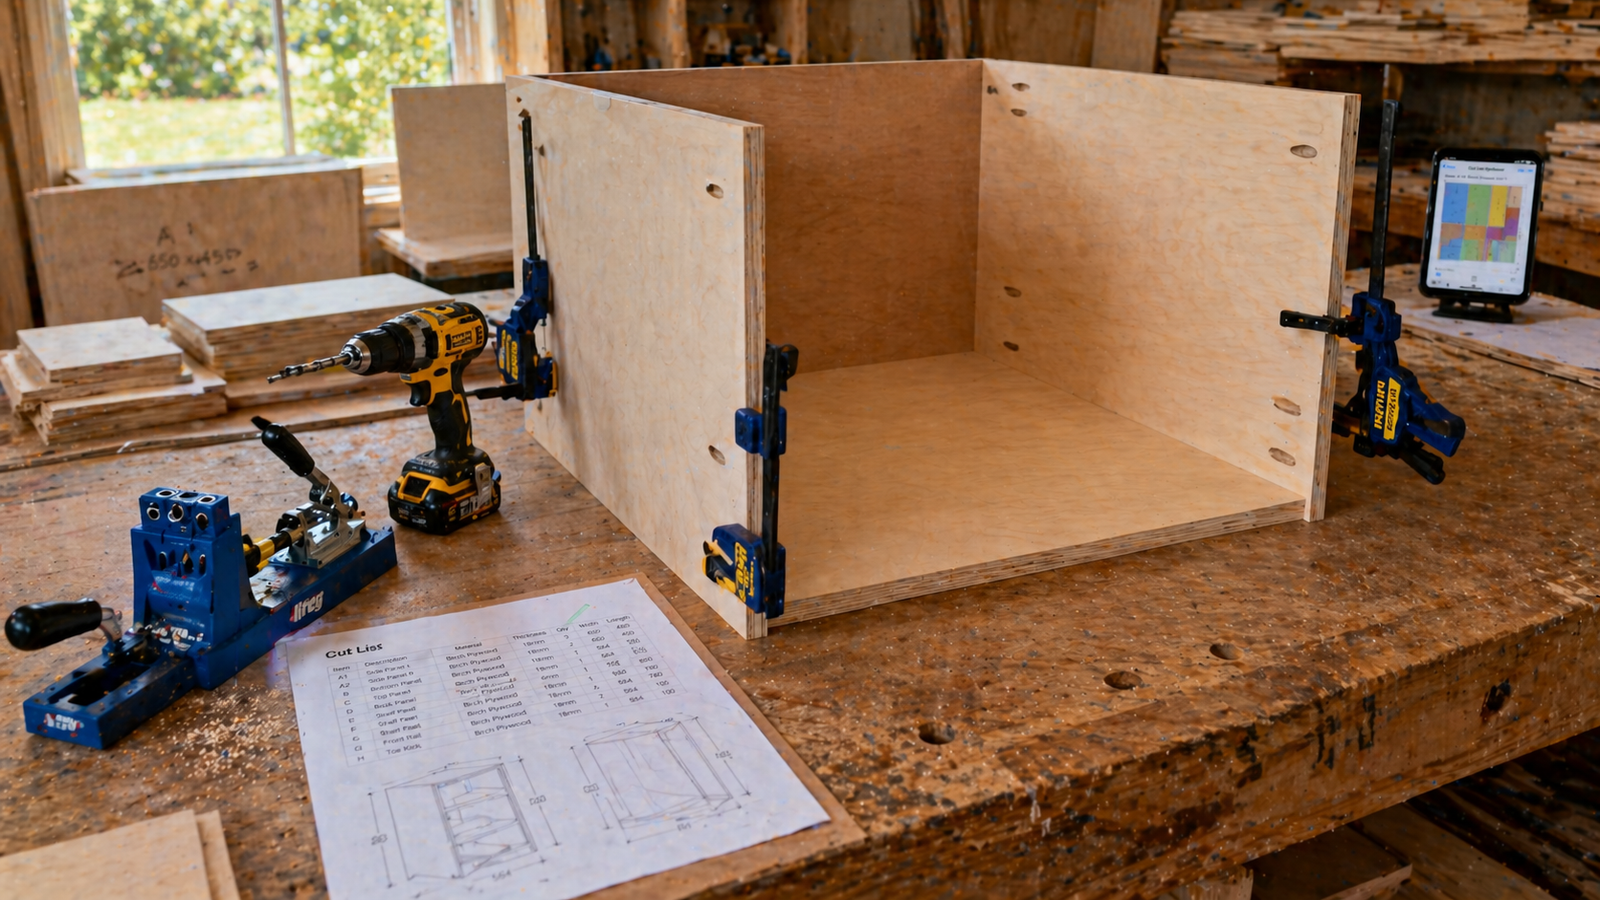
Once parts are cut and edge-banded, assembly of a frameless carcass is straightforward. The most beginner-friendly joinery method for plywood boxes is pocket screws (Kreg system or equivalent), which require no router, no dado cutting, and no complex jig setup — just a pocket hole jig, a drill, and the screws themselves.
Assembly Sequence
- Drill pocket holes — drill pocket holes on the inside face of both the top and bottom panels at each end (four pocket holes per panel, two per joint). Use 18 mm settings on your pocket hole jig for ¾" material.
- Attach the bottom panel to the side panels — clamp the bottom panel between the side panels at the correct height (typically 100–130 mm from the bottom to allow for adjustable legs and a toe-kick plinth). Drive pocket screws to secure.
- Attach the top panel — clamp and screw the top panel flush with the top edges of the side panels in the same way.
- Check for square — measure diagonals before the glue or screws set. Equal diagonal measurements = square box. Adjust by racking the box slightly if needed.
- Attach the back panel — with the box square, nail or staple the 6 mm back panel to the rear edges of all four main panels. The back panel locks the box square permanently.
- Install fixed shelf (if included) — add the fixed shelf at your desired height, secured with pocket screws or shelf pins in pre-drilled holes.
One cabinet box takes an experienced builder 20–30 minutes to assemble. A beginner should allow 45–60 minutes per box for the first few, including dry-fitting before final assembly. A kitchen of six boxes is a full day's assembly work at a relaxed beginner's pace.
Common Beginner Mistakes to Avoid
| Mistake | Consequence | Prevention |
|---|---|---|
| Using nominal instead of actual plywood thickness | All interior dimensions are wrong; parts don't fit | Measure actual sheet thickness with a caliper before building the cut list |
| Not accounting for hinge setback on top/bottom panels | Doors won't close fully or hinges can't be mounted | Verify setback requirement for your specific hinge model before finalising panel depth |
| Buying sheets before running the optimizer | Over-buying or under-buying material; wrong sheet count | Enter the complete kitchen cut list into the cut list optimizer first; buy exactly what it says |
| Assembling without checking square | Cabinet is racked; doors and drawers won't align | Check diagonals before attaching the back panel; rack and re-check until equal |
| Inconsistent grain direction on visible panels | Adjacent cabinets look mismatched in the finished kitchen | Lock grain direction on all side panels and door fronts in the optimizer; verify arrows in cutting diagram |
| Forgetting to order edge banding | Project stalls waiting for supplies; banding from a different lot may not match | Use the optimizer's total banding length output to order everything in one lot before starting cuts |
✅ Verdict: Building kitchen cabinets with a cut list is one of the most structured, repeatable woodworking projects a beginner can tackle — and the cut list is what makes it manageable. Every cabinet is a variation of the same six-part box. Get the dimensions right once, enter them into the Cut Optimizer app, run the optimization, and you have an exact material order and a step-by-step cutting plan for your entire kitchen before you've touched a saw.
📱 Build Your Kitchen Cabinet Cut List Right Now
Cut Optimizer for iPhone and iPad handles the full complexity of a kitchen cabinet project — multiple cabinet widths, mixed sheet thicknesses, grain direction, edge banding, and cross-nesting across all sheets. Know your exact sheet count before you buy a single panel.
Frequently Asked Questions
What thickness plywood should I use for kitchen cabinets?
The industry standard for frameless kitchen cabinet carcasses is 18 mm (¾") plywood or melamine-faced particleboard. Birch plywood is the most popular choice for painted or clear-finished kitchens — it's dimensionally stable, takes edge banding and paint well, and has a consistent, void-free core. Melamine-faced particleboard (MFC) is the most economical option and comes pre-finished, eliminating painting and edge banding for interior surfaces. For back panels, 6–8 mm hardboard or thin plywood is standard — it adds rigidity without weight. Always measure your actual sheet thickness with a caliper before building your cut list, as nominal and actual thickness can differ by up to 1 mm.
How many sheets of plywood does a kitchen of cabinets require?
A rough rule of thumb is one sheet of 18 mm plywood per base cabinet, plus one sheet per two wall cabinets — but this varies significantly with cabinet widths, shelf count, and drawer box quantities. The only accurate way to know before buying is to enter your complete kitchen cut list into a cut list calculator app and run the optimization. A kitchen with six base cabinets and four wall cabinets typically requires 7–10 sheets of 18 mm material, but the optimizer will tell you the precise number for your specific design.
What joinery method is best for beginner-built kitchen cabinets?
Pocket screws (using a Kreg Jig or equivalent) are the most beginner-friendly joinery method for plywood cabinet boxes. They require no router, no dado cutting, and no complex setup — just a dedicated pocket hole jig and the matching screws. For stronger and more professional results once you're comfortable with the basics, through-dado joints (a dado routed into the side panels to receive the top, bottom, and shelf) are the industry standard in professional cabinet shops and produce a stronger, more rigid box. Both methods work well; pocket screws are faster and more forgiving for first-time builders.
Do I need a face frame on my kitchen cabinets?
No — frameless (European-style) construction produces fully professional kitchen cabinets without a face frame. Frameless cabinets use full-overlay doors and drawers that cover the entire front face of the carcass, concealing the plywood edges and giving a clean, contemporary appearance. Face frames are a stylistic and regional preference, not a structural requirement. For a beginner's first kitchen build, frameless construction is strongly recommended: fewer parts, simpler joinery, and a cut list that's straightforward to build and optimise.
How do I make sure all my cabinets are the same height?
Consistent cabinet height comes from two things: accurate cutting (all side panels cut to exactly the same length) and a consistent assembly reference. Always cut all side panels for all cabinets at the same fence setting in a single session — don't reset the fence between cabinets. During assembly, build each box on a known-flat surface and measure the diagonal of each box before attaching the back panel. A flat assembly table and equal diagonals are the two non-negotiable requirements for a cabinet run that installs level and true.
Can I use a cut list optimizer app for wall cabinets and drawer boxes as well as base cabinets?
Yes — the Cut Optimizer app handles any combination of parts in a single project. You can enter base cabinet parts, wall cabinet parts, drawer box parts, and door blanks all together, assign each to the correct material and thickness, and the optimizer will cross-nest everything across the minimum number of sheets. For a full kitchen project, entering every part — bases, walls, drawers, and doors — in one project gives you the tightest possible layout and the most accurate total material order.
how to build kitchen cabinets cut listDIY kitchen cabinet cut list beginnerframeless cabinet cut list plywoodkitchen cabinet parts dimensionsplywood kitchen cabinet carcasscut list optimizer kitchen cabinetshow many sheets plywood kitchen cabinetsbase cabinet box dimensions 600mm